







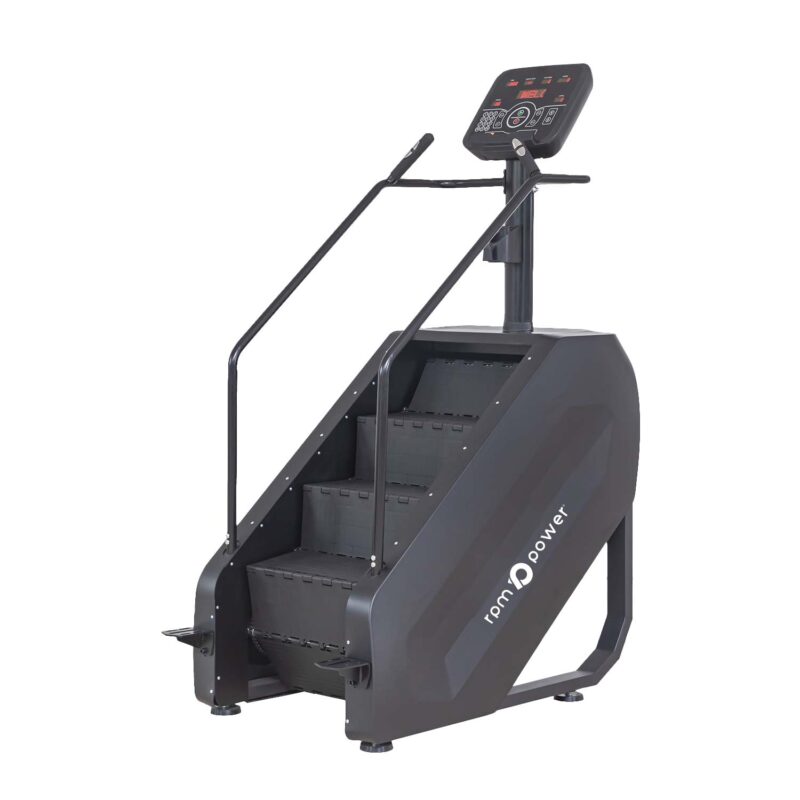
Stair Climber Assembly
RPM Power Stair Climber: Assembly & Care
The RPM Power Stair Climber uses revolving steps and 15 exercise levels for adjustable climbing workouts. Installation follows three simple stages: bolt the footplates to the main frame, connect and bolt the monitor upright, then connect the sensors and bolt the handrails.
Use the photographs below alongside the downloadable user guide. No machine panels need to be removed for this installation.
Before you start
Assemble the machine in its final position, indoors on a firm, level floor. All support feet must contact the floor and the machine must not rock. Keep the lower-step entry and exit area clear, and retain the 2,000 × 1,000 mm rear safety space specified in the user guide.
RPM Power recommends a ceiling height of at least 250 cm. Taller users may need more clearance: check safe headroom for the tallest intended user before use. The machine is for one user at a time, up to 160 kg.
Keep power disconnected throughout assembly. Check the supplied parts and bolts before you begin, and retain the packaging until installation is complete. Use competent helpers and suitable handling equipment for this heavy machine; do not lift it by the monitor, handrails or covers.
If a part or fixing is missing, damaged or does not fit, stop and contact RPM Power Support. Do not substitute hardware or force parts together.
Stair Climber assembly
1. Bolt the footplates to the main frame
- Position the left and right fixed footplates at their matching mounting points on the main frame.
- Align the two holes in each footplate bracket and secure it using the supplied bolts, as shown in the photograph.
- Check that both footplates are firmly attached before continuing.
These are the fixed side access footplates beside the lowest revolving step, not the moving stairs.

2. Connect and bolt the monitor upright
- Have a helper support the monitor and upright at the mounting position. Access the upright base from the front of the machine.
- Connect the main wire from the stair-machine body to the matching wire from the monitor upright at this mounting point. Push the plugs together gently until seated; do not force them or pull on the wires.
- Tuck the connection inside and lower the upright gently into position. Keep the wiring clear of the socket, mounting faces and bolt holes.
- Align the fixing holes and secure the upright with the supplied bolts and washers, as shown. Check that it is firm and no wire is caught, pinched or stretched.

Connect the main cable before fully seating and bolting the monitor upright. If a wire is caught or the upright will not seat freely, stop and reposition the wire. Never force the upright into place or tighten bolts over a trapped wire.
3. Connect the sensors and bolt the handrails
- Support each handrail near its upper mounting point. Connect its sensor wire to the matching monitor lead at the side of the upright. Match the plugs and push them together gently.
- Tuck the connected wires inside the steel handrail or monitor upright, without tension. Keep the connector and wiring clear of the joining plate faces and bolt holes.
- Align each rail at its upper and lower fixing points and fit the supplied bolts loosely. Before tightening the upper joint, check that no wire is caught between the two joining plates.
- Tighten the rail bolts and check both handrails for movement. Recheck all assembly bolts and remove any remaining tools or packaging.

Check between the two plates before tightening. Keep all wiring inside the rail or upright and clear of the mating faces. If the plates will not meet freely, stop and reposition the wiring; do not use the bolts to force them together.
Check before the first workout
Confirm that the footplates, monitor upright and both handrails are secure. Check that the main machine-to-monitor cable and both handrail sensor connections are seated, with wiring tucked inside and free from pinching. All guards and covers must be fitted, the machine must be stable, and the required headroom and safety space must be available.
Check the machine rating plate against the local supply before connecting power. RPM Power lists AC220V for this model. Use the supplied undamaged cable and a suitable earthed outlet. Do not change internal voltage settings. If the rating or connection is unclear, ask RPM Power or a qualified electrician.
A competent installer must verify the holding brake, START/pause, STOP and optical safety sensor using the approved model-specific procedure. Do not place hands or feet in moving steps or use a person to test the optical sensor. Do not use the machine if a stopping function fails or an installation detail cannot be verified.
Using the Stair Climber
You must stand on the revolving steps before the machine will work. It will not operate without a user standing on the steps.
Before every session, check that the floor and steps are dry, fixings are secure, and the cable, guards and covers are undamaged. Keep children, pets and bystanders clear. Wear secure training shoes and fitted clothing, and tie back long hair. First-time users should receive instruction from a qualified trainer.
Get on and check the brake
Switch on only after the installation and electrical checks are complete. Wait for the console to be ready. Without pressing START, hold both handrails and use a fixed side footplate to mount carefully. Apply weight to a revolving step while maintaining your grip.
The steps must not descend continuously before START is pressed. If they do, do not train. Maintain your handrail grip, get clear only when safe, and contact RPM Power. Do not try to adjust the brake yourself.
Start, pause and stop
Stand securely, face the monitor and keep both hands on the rails initially. Check the selected level, choose a low starting level where available, then press the green START button. Be ready for the steps to move. Use the arrows to change the level gradually; avoid large jumps in pace.
To pause, press the green START/pause button and keep your handrail grip until the steps stop. Check your footing and level before continuing. If the restart prompt is unclear, end the session with STOP rather than guessing.
To finish, press the red STOP button. This stops the machine and clears the displayed workout data. Wait until the steps are stationary, then use a fixed side footplate to get off carefully. Never mount or dismount while the steps are moving.
If you need to stop urgently, press STOP immediately and hold the rails; do not jump off moving steps. The optical sensor is an additional protective feature, not a substitute for STOP or safe footing. Stop exercising immediately if you feel dizzy, have pain or feel unwell.
The full user guide explains the console controls, workout modes and optional functions. Treat calories, heart rate and body-fat readings as fitness estimates, not medical measurements.
Routine care
Switch off, unplug and wait for all movement to stop before cleaning or inspection. Wipe sweat and dust from exposed surfaces with a soft cloth lightly dampened with water or a suitable diluted cleaner. Follow the cleaner manufacturer’s instructions. Apply liquid to the cloth, not the machine; do not spray, soak or use acidic or concentrated cleaners. Let all surfaces dry fully before use.
Use a soft nylon brush on accessible step grooves without reaching into the mechanism. Vacuum the accessible floor around and beneath the machine without moving it unsafely. Check floor stability, visible fixings and externally accessible controls regularly.
If you notice slipping, loose parts, unusual noise, damaged wiring or unreliable stopping, stop using the machine, isolate power and mark it out of use. Arrange qualified inspection before training again. Internal brake, belt, drive and safety-device work is for qualified personnel. Do not add lubricant or adjust belt tension without an approved service instruction.
Need a hand?
If a step differs from the components supplied with your machine, or a connector will not match, pause installation and contact RPM Power Support. Have your order number, proof of purchase, serial number if fitted and a short description ready; include clear photos where useful.
You can also review the Stair Climber product page and current RPM Power warranty terms. Keep your receipt.