



Colossus Assembly Tips
Leg Press Colossus: Assembly & Care
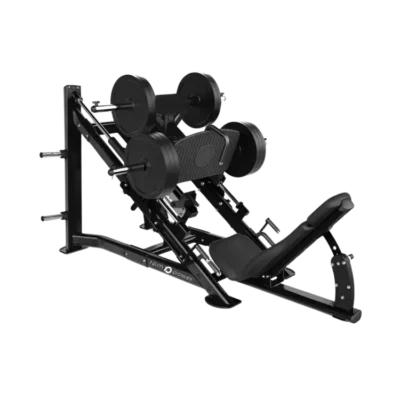
Follow this written companion to the RPM Power assembly video for the plate-loaded Leg Press Colossus. Watch the full video before you begin, then use the checklist below to keep the assembly sequence and important safety points close at hand.
Video not displaying? Watch the Colossus assembly guide on YouTube.
Important: take particular care when fitting the footplate. This is the only difficult assembly step. If you are not an experienced installer, use at least three people: two support the heavy footplate/plate-holder section while a third holds and aligns the guide rods. Never force the bearing sleeves onto the rods; incorrect alignment can damage the ball bearings inside.
Before you start
- Choose a stable, level position and leave clear space to handle the large sections safely. RPM Power lists the assembled machine at 249 × 155 × 155 cm and 322 kg.
- Identify the two side frames, four foot covers, middle section, seat assembly, footplate/plate-holder section, silver guide rods, rubber covers and supplied fixings before lifting anything into place.
- All main frame bolts are the same size and arrive pre-positioned on the pieces. Use the bolts supplied in their intended positions; set aside any guide-rod retaining screws removed for the footplate step so they can be refitted.
- If you are not an experienced installer, arrange at least three people for the footplate stage. Keep weight plates off the machine during assembly and keep hands clear of moving and pinch points.
- Use tools suitable for the supplied fixings. The short video does not specify a tool size or tightening torque; do not guess a torque value or substitute missing hardware.
Assembly sequence
- Position the side frames and fit the feet. Set the two large side sections approximately the correct distance apart. Fit all four foot covers: two at the front and two at the back. The video recommends doing this now, before the assembled frame becomes too heavy to lift easily.
- Join the middle section. Attach the central cross-section between the two side frames using eight bolts in total: two at the top and two at the bottom on each side. Align the sections and secure the supplied fixings. If a bolt does not engage normally, stop and check alignment rather than forcing it.
- Attach the seat assembly. Position the chair/seat assembly and secure it with four bolts, two at the bottom on each side, as shown in the video.
- Slide on the main footplate/plate-holder section. Do this stage slowly; the bearing sleeves must meet the silver guide rods at the correct angle.
- Leave the lower ends of the rods correctly seated in their bottom holders. The lower retaining screws referenced in the video should not be fully fixed yet; remove/set aside the two screws shown if necessary to allow this movement. Do not pull the rods out of the bottom holders.
- Angle the upper ends outward from their top holders while keeping both lower ends in place. The diagram below shows the top and bottom holders with green arrows and illustrates the temporary rod angle with red lines.
- If you are not an experienced installer, have two people hold the footplate/plate-holder section while a third holds the rods at the correct angle. Slide the bearing sleeves onto the rods slowly and evenly, matching the angle of the sleeves to the rods. If a sleeve catches or resists, stop and realign it; forcing it can damage the ball bearings inside.
- Once the section is correctly on the rods, guide the upper rod ends back into their top holders. Position the rubber covers on opposite sides of the moving plate-holder section: one below it at the bottom, the other above it at the top. Confirm both rods remain seated in their bottom holders, then refit and securely fasten the lower retaining screws and any other loosened fixings before releasing support.

Check before the first workout
- Confirm all frame, seat, guide-bar and footplate fixings have been fitted and secured; check that all four feet contact the floor firmly and the machine does not rock.
- Check the upper and lower rubber covers and both guide rods are correctly in place. Keep people clear of the carriage path while checking for smooth travel, with no binding or unusual noise.
- Check the carriage’s engage/disengage release and the back-pad adjustments operate correctly as described on the product page. Perform these checks without weight plates loaded and do not use the machine if anything feels insecure.
- If a component, bolt or rubber cover is missing or damaged, stop assembly and contact RPM Power Support before use.
Routine care
Before use, look for loose fixings, worn rubber covers, damage to the footplate or upholstery, and any roughness in the guide-rod or carriage movement. Wipe sweat and dust from the frame, guide rods and pads with a soft cloth. If the machine develops wobble, binding or unexpected noise, stop using it and arrange a check before loading it again.
For general upkeep, see RPM Power’s fitness equipment maintenance guide. Do not apply a lubricant or perform adjustments to this machine unless they are appropriate for the affected part; ask RPM Power Support if you are unsure.
Need a hand? If a step in the video differs from the components supplied with your Colossus, pause the assembly and contact RPM Power Support. You can also review the Colossus product page for specifications.